> ## Documentation Index
> Fetch the complete documentation index at: https://docs.baimoqilin.com/llms.txt
> Use this file to discover all available pages before exploring further.
# Getting started
> Absolute beginner path: from vanilla launcher to your first MineClawd chat.
## Goal
Follow this page step by step, and you will get one successful reply from MineClawd.
## Tiny glossary
The PC version of Minecraft from the official Minecraft Launcher.
Software that lets Minecraft run mods. MineClawd supports Fabric, Forge, and NeoForge.
A `.jar` file that adds features to Minecraft.
A secret key that lets MineClawd talk to an online AI service.
## Choose your platform
MineClawd supports three loader and version combinations. Pick the tab that matches your setup.
### Step 1: install NeoForge
1. Download NeoForge Installer from: [neoforged.net](https://neoforged.net/)
2. Select Minecraft version **1.21.1** and run the installer.
3. Open Minecraft Launcher and run the **NeoForge 1.21.1** profile once, then close the game.
### Step 2: download required mods
Download these files from Modrinth. On each page, choose a file matching **NeoForge** and **1.21.1**.
| Mod | Download link |
| ----------------------------- | ------------------------------------------------------------------------------ |
| MineClawd | [modrinth.com/mod/mineclawd](https://modrinth.com/mod/mineclawd) |
| KubeJS | [modrinth.com/mod/kubejs](https://modrinth.com/mod/kubejs) |
| Architectury API | [modrinth.com/mod/architectury-api](https://modrinth.com/mod/architectury-api) |
| Rhino | [modrinth.com/mod/rhino](https://modrinth.com/mod/rhino) |
| YetAnotherConfigLib v3 (YACL) | [modrinth.com/mod/yacl](https://modrinth.com/mod/yacl) |
| Better ModList | [modrinth.com/mod/better-modlist](https://modrinth.com/mod/better-modlist) |
### Step 1: install Forge
1. Download Forge Installer from: [files.minecraftforge.net](https://files.minecraftforge.net/net/minecraftforge/forge/index_1.20.1.html)
2. Run the installer and select **Install Client**.
3. Open Minecraft Launcher and run the **Forge 1.20.1** profile once, then close the game.
### Step 2: download required mods
Download these files from Modrinth. On each page, choose a file matching **Forge** and **1.20.1**.
| Mod | Download link |
| ----------------------------- | ------------------------------------------------------------------------------ |
| MineClawd | [modrinth.com/mod/mineclawd](https://modrinth.com/mod/mineclawd) |
| KubeJS | [modrinth.com/mod/kubejs](https://modrinth.com/mod/kubejs) |
| Architectury API | [modrinth.com/mod/architectury-api](https://modrinth.com/mod/architectury-api) |
| Rhino | [modrinth.com/mod/rhino](https://modrinth.com/mod/rhino) |
| YetAnotherConfigLib v3 (YACL) | [modrinth.com/mod/yacl](https://modrinth.com/mod/yacl) |
| Better ModList | [modrinth.com/mod/better-modlist](https://modrinth.com/mod/better-modlist) |
### Step 1: install Fabric
1. Download Fabric Installer from: [fabricmc.net/use/installer](https://fabricmc.net/use/installer/)
2. Run the installer.
3. Choose **Client** and Minecraft version **1.20.1**.
4. Click **Install**.
5. Open Minecraft Launcher and run **Fabric Loader 1.20.1** once, then close the game.
### Step 2: download required mods
Download these files from Modrinth. On each page, choose a file matching **Fabric** and **1.20.1**.
| Mod | Download link |
| ----------------------------- | ------------------------------------------------------------------------------ |
| MineClawd | [modrinth.com/mod/mineclawd](https://modrinth.com/mod/mineclawd) |
| Fabric API | [modrinth.com/mod/fabric-api](https://modrinth.com/mod/fabric-api) |
| KubeJS | [modrinth.com/mod/kubejs](https://modrinth.com/mod/kubejs) |
| Architectury API | [modrinth.com/mod/architectury-api](https://modrinth.com/mod/architectury-api) |
| Rhino | [modrinth.com/mod/rhino](https://modrinth.com/mod/rhino) |
| YetAnotherConfigLib v3 (YACL) | [modrinth.com/mod/yacl](https://modrinth.com/mod/yacl) |
| Mod Menu | [modrinth.com/mod/modmenu](https://modrinth.com/mod/modmenu) |
## Step 3: put mod files into your `mods` folder
1. Open your Minecraft folder.
2. Open `mods` folder. If it does not exist, create it.
3. Move all downloaded `.jar` files into `mods`.
4. Do not unzip `.jar` files.
## Step 4: launch game and open MineClawd config
1. Start Minecraft with your mod loader profile.
2. Create or open a single-player world.
3. Turn **Allow Cheats** ON for that world.
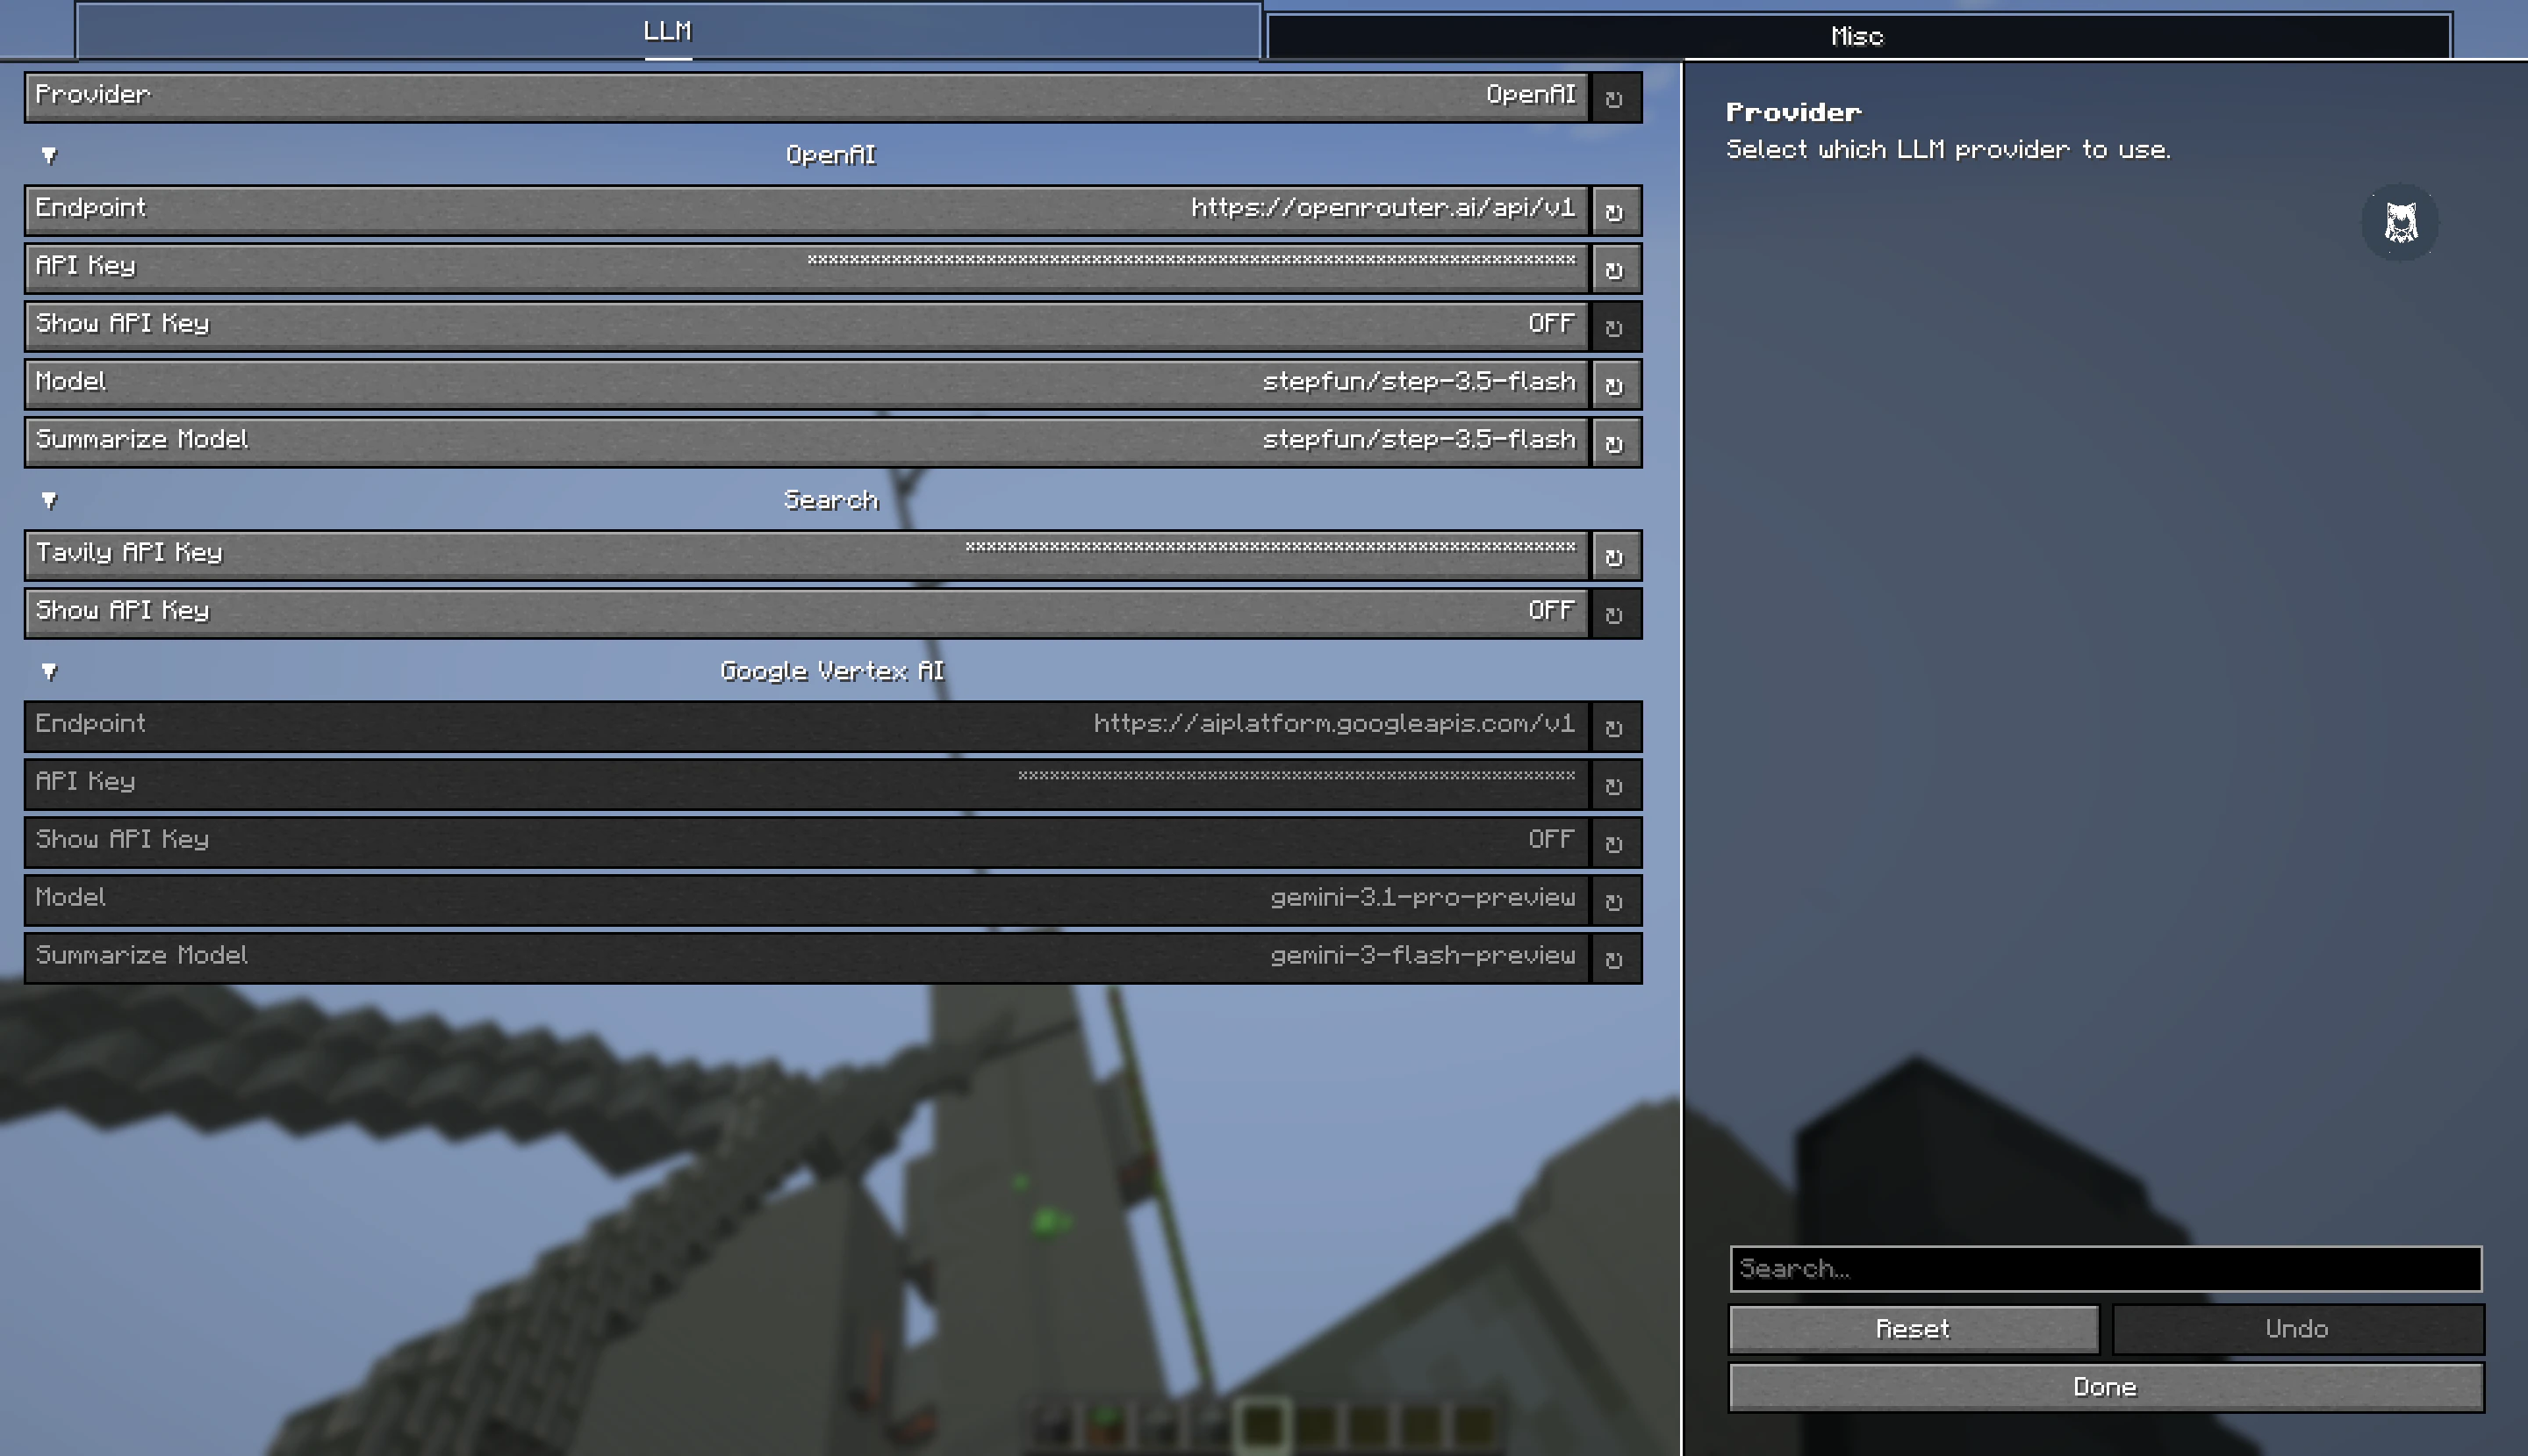
4. Open **Better ModList** -> **MineClawd** -> **Configure** (or **Mod Menu** if on Fabric).
 ## Step 5: connect an AI service
If you do not have an AI account yet, use OpenRouter and pick a free model.
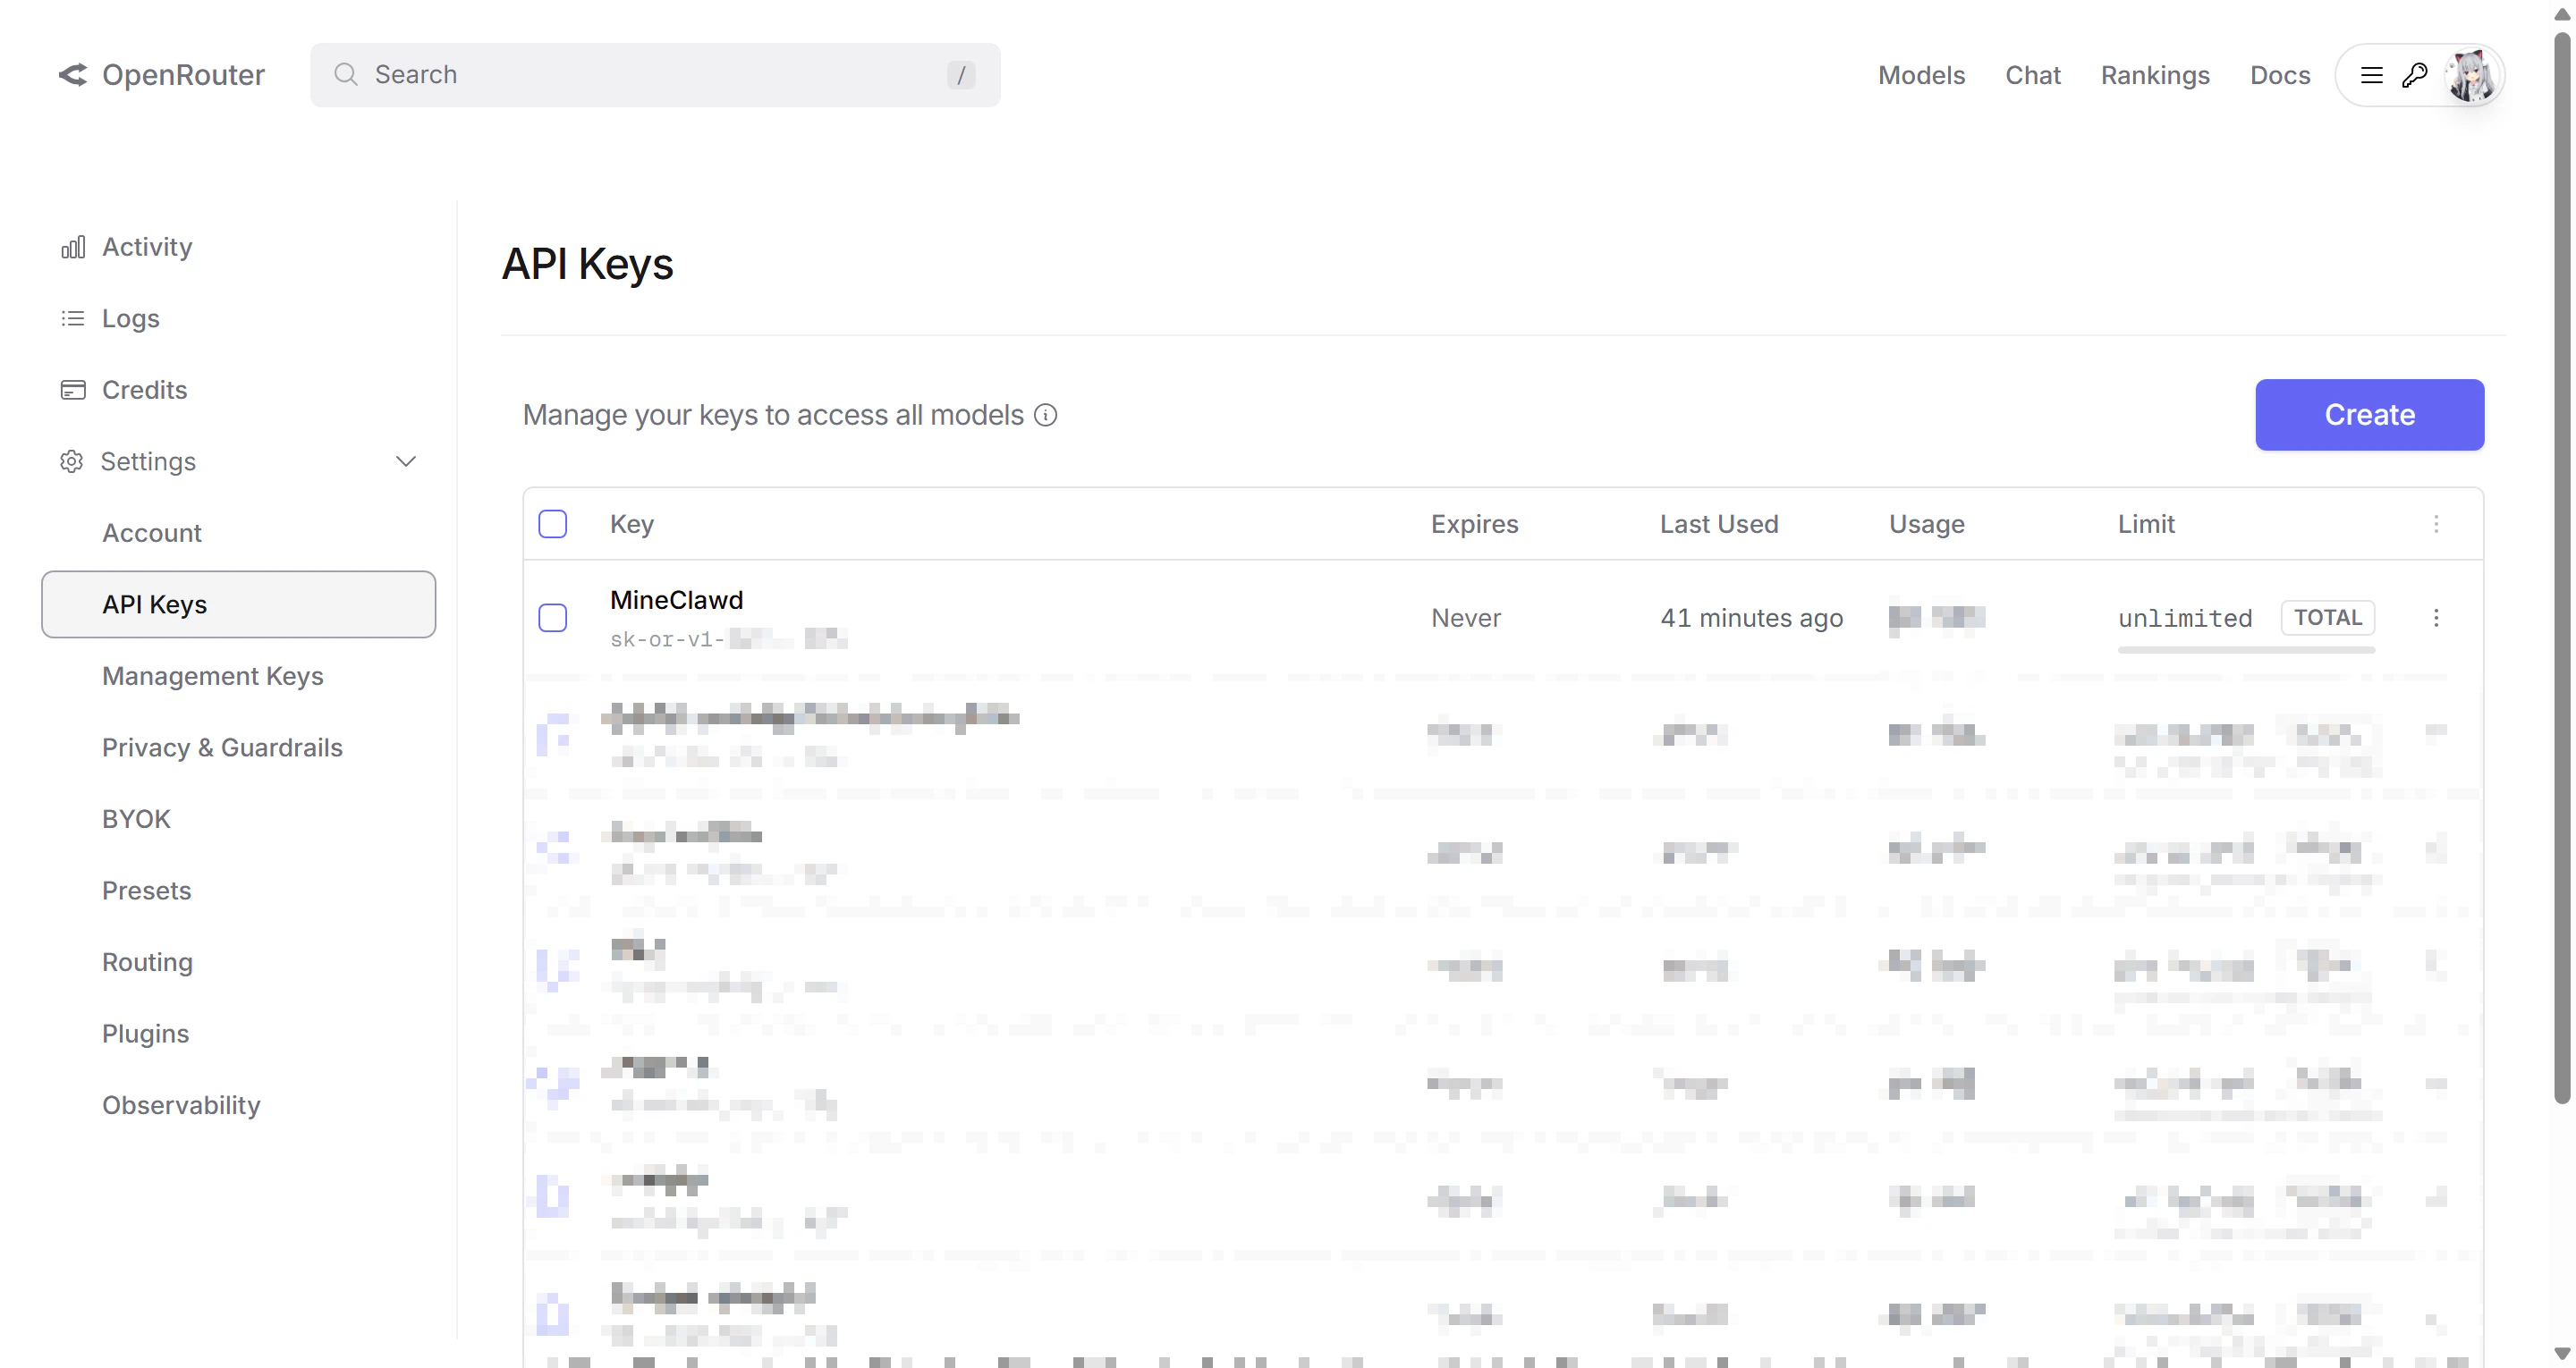
1. Create account: [openrouter.ai](https://openrouter.ai/)
2. Create API key: [openrouter.ai/settings/keys](https://openrouter.ai/settings/keys)
## Step 5: connect an AI service
If you do not have an AI account yet, use OpenRouter and pick a free model.
1. Create account: [openrouter.ai](https://openrouter.ai/)
2. Create API key: [openrouter.ai/settings/keys](https://openrouter.ai/settings/keys)
 3. In MineClawd config screen, set:
* **Provider**: `OpenAI`
* **Endpoint**: `https://openrouter.ai/api/v1`
* **API Key**: paste your OpenRouter key
* **Model**: pick one model id from [openrouter.ai/models](https://openrouter.ai/models) (free models often include `:free`)
* **Summarize Model**: use the same model id for now
4. Save config.
Free models and limits change over time. If one model fails, pick another model id from the same models page.
### Step 5b (optional): enable web search
MineClawd can search the web during conversations using Tavily. This is optional but useful when you want MineClawd to look up mod documentation, crafting recipes, or other online references.
1. Create a Tavily account: [tavily.com](https://tavily.com/)
2. Copy your API key from the Tavily dashboard.
3. In MineClawd config screen, set:
* **Provider**: `OpenAI`
* **Endpoint**: `https://openrouter.ai/api/v1`
* **API Key**: paste your OpenRouter key
* **Model**: pick one model id from [openrouter.ai/models](https://openrouter.ai/models) (free models often include `:free`)
* **Summarize Model**: use the same model id for now
4. Save config.
Free models and limits change over time. If one model fails, pick another model id from the same models page.
### Step 5b (optional): enable web search
MineClawd can search the web during conversations using Tavily. This is optional but useful when you want MineClawd to look up mod documentation, crafting recipes, or other online references.
1. Create a Tavily account: [tavily.com](https://tavily.com/)
2. Copy your API key from the Tavily dashboard.
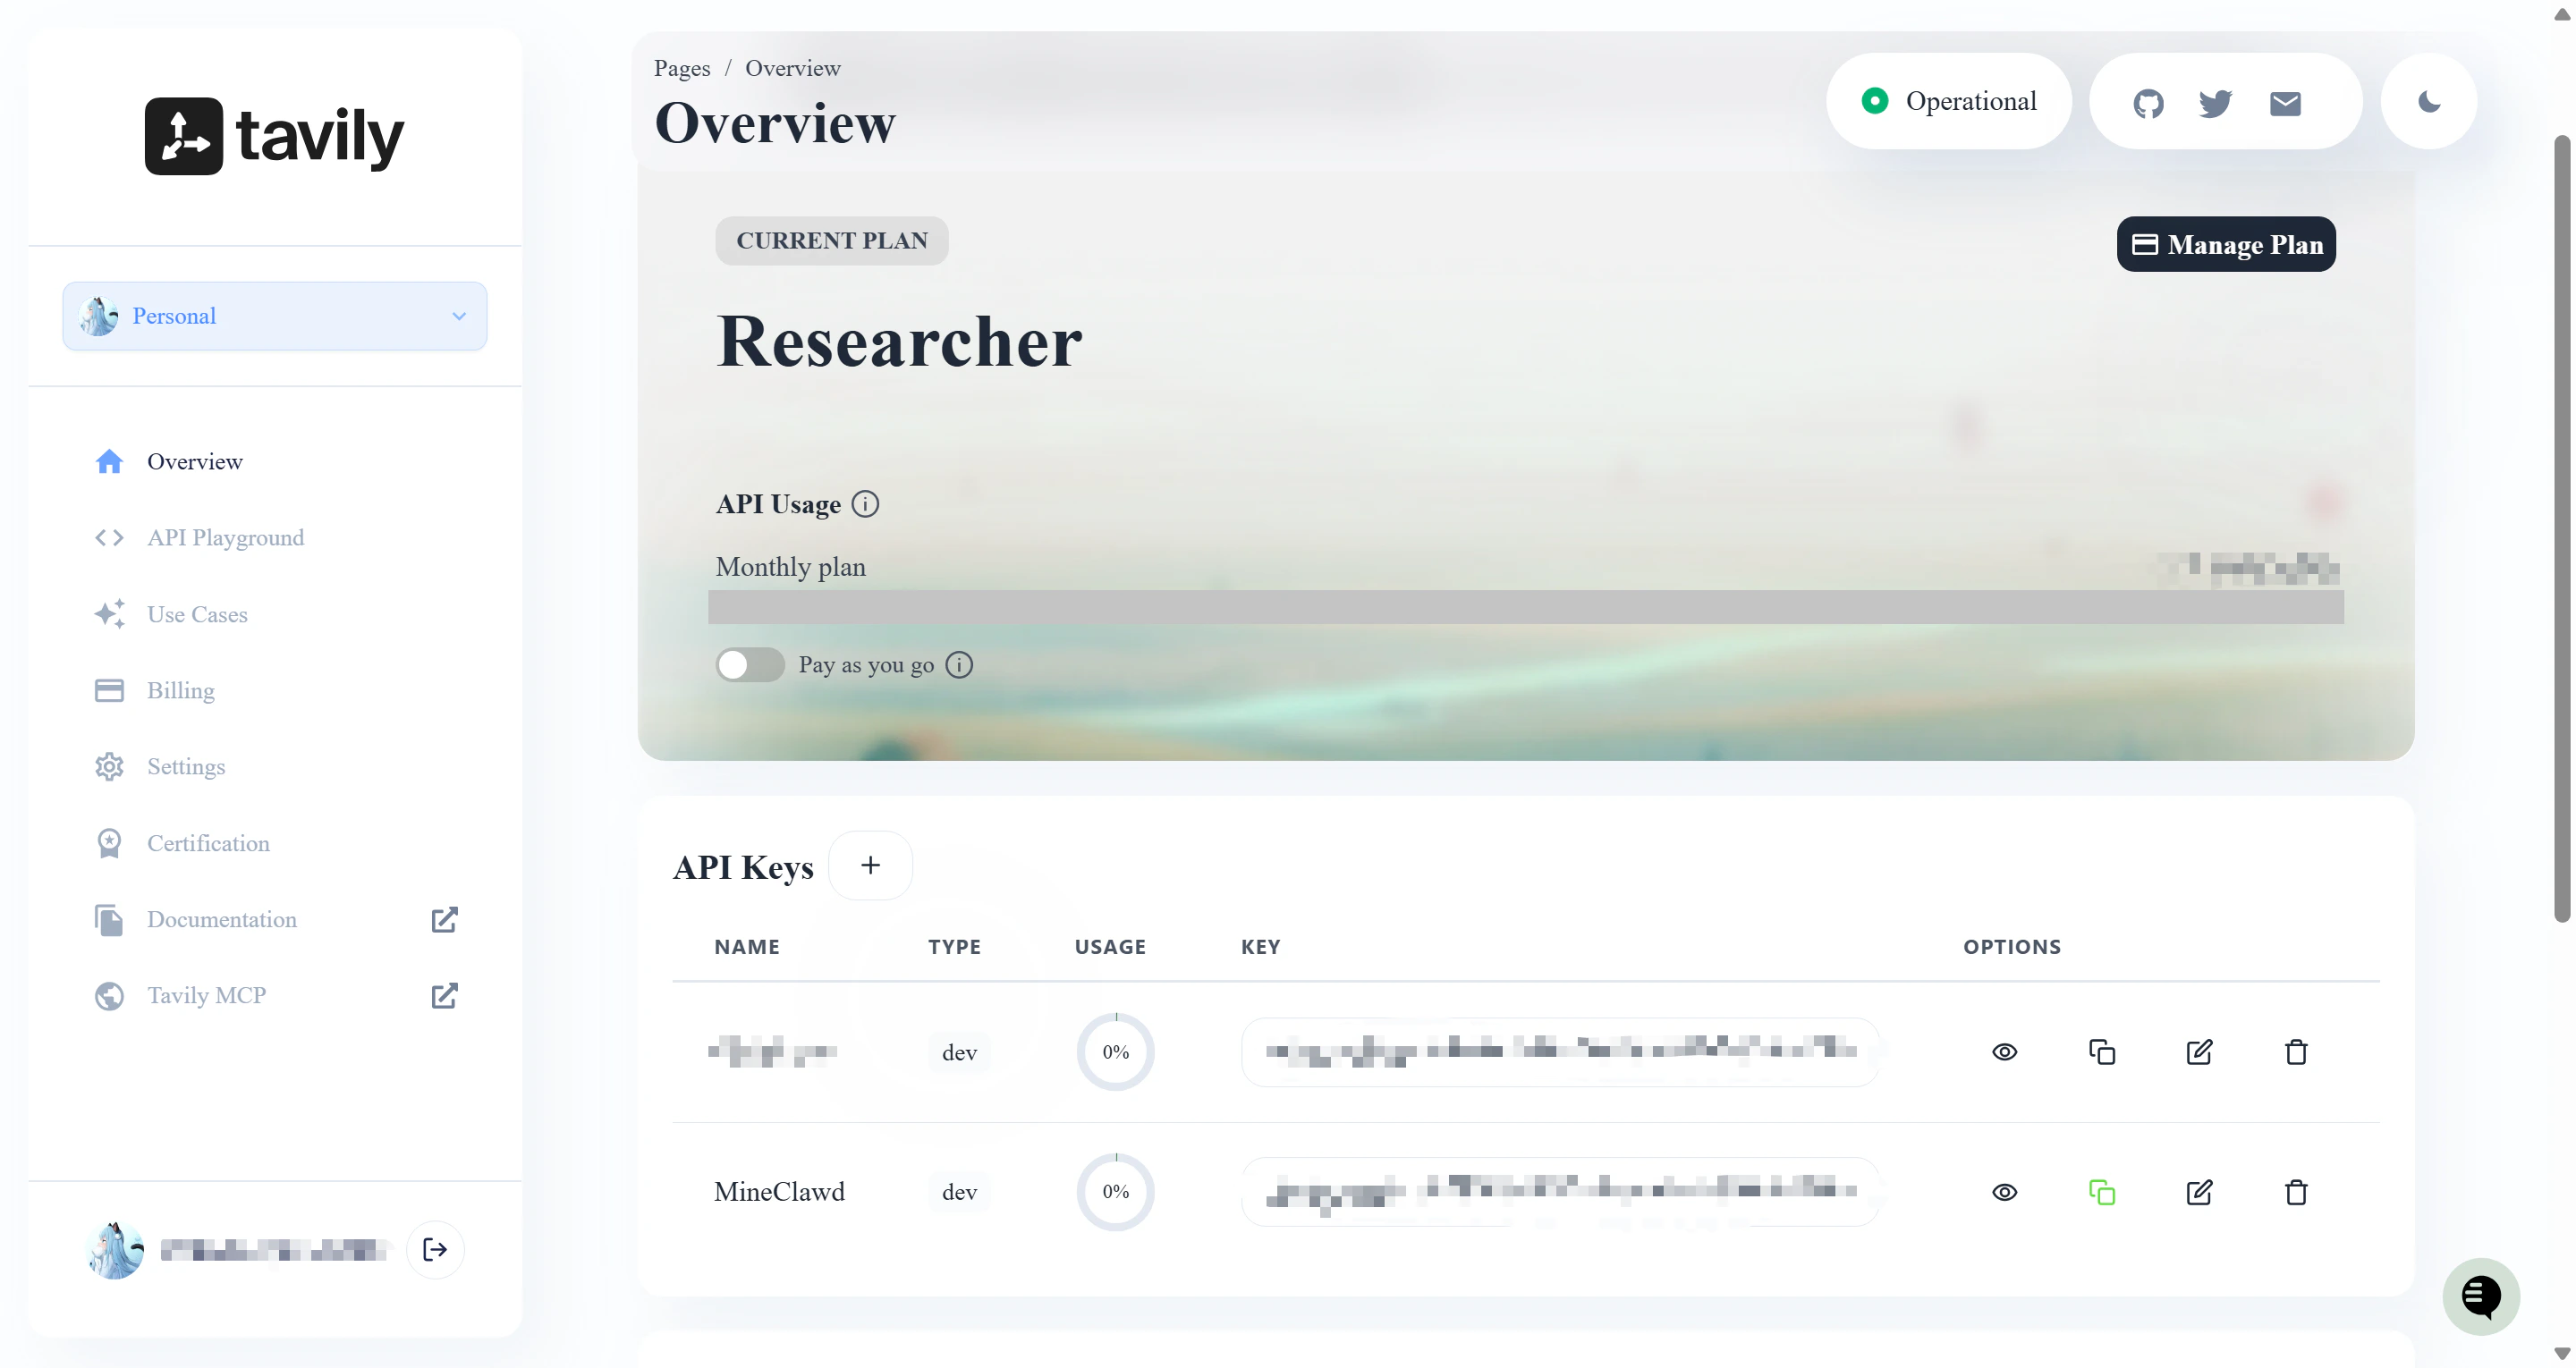 3. In MineClawd config screen, paste the key into the **Tavily API Key** field under the **Search** group. You can also set it via command:
```bash theme={null}
/mineclawd config tavily-api-key
```
When configured, MineClawd gains a `search` tool that queries the web and returns concise source snippets. If the key is not set, the search tool is disabled and MineClawd will let you know if you ask for a web search.
## Step 6: send your first message
You have two ways to talk to MineClawd:
### Option A: use the overlay GUI
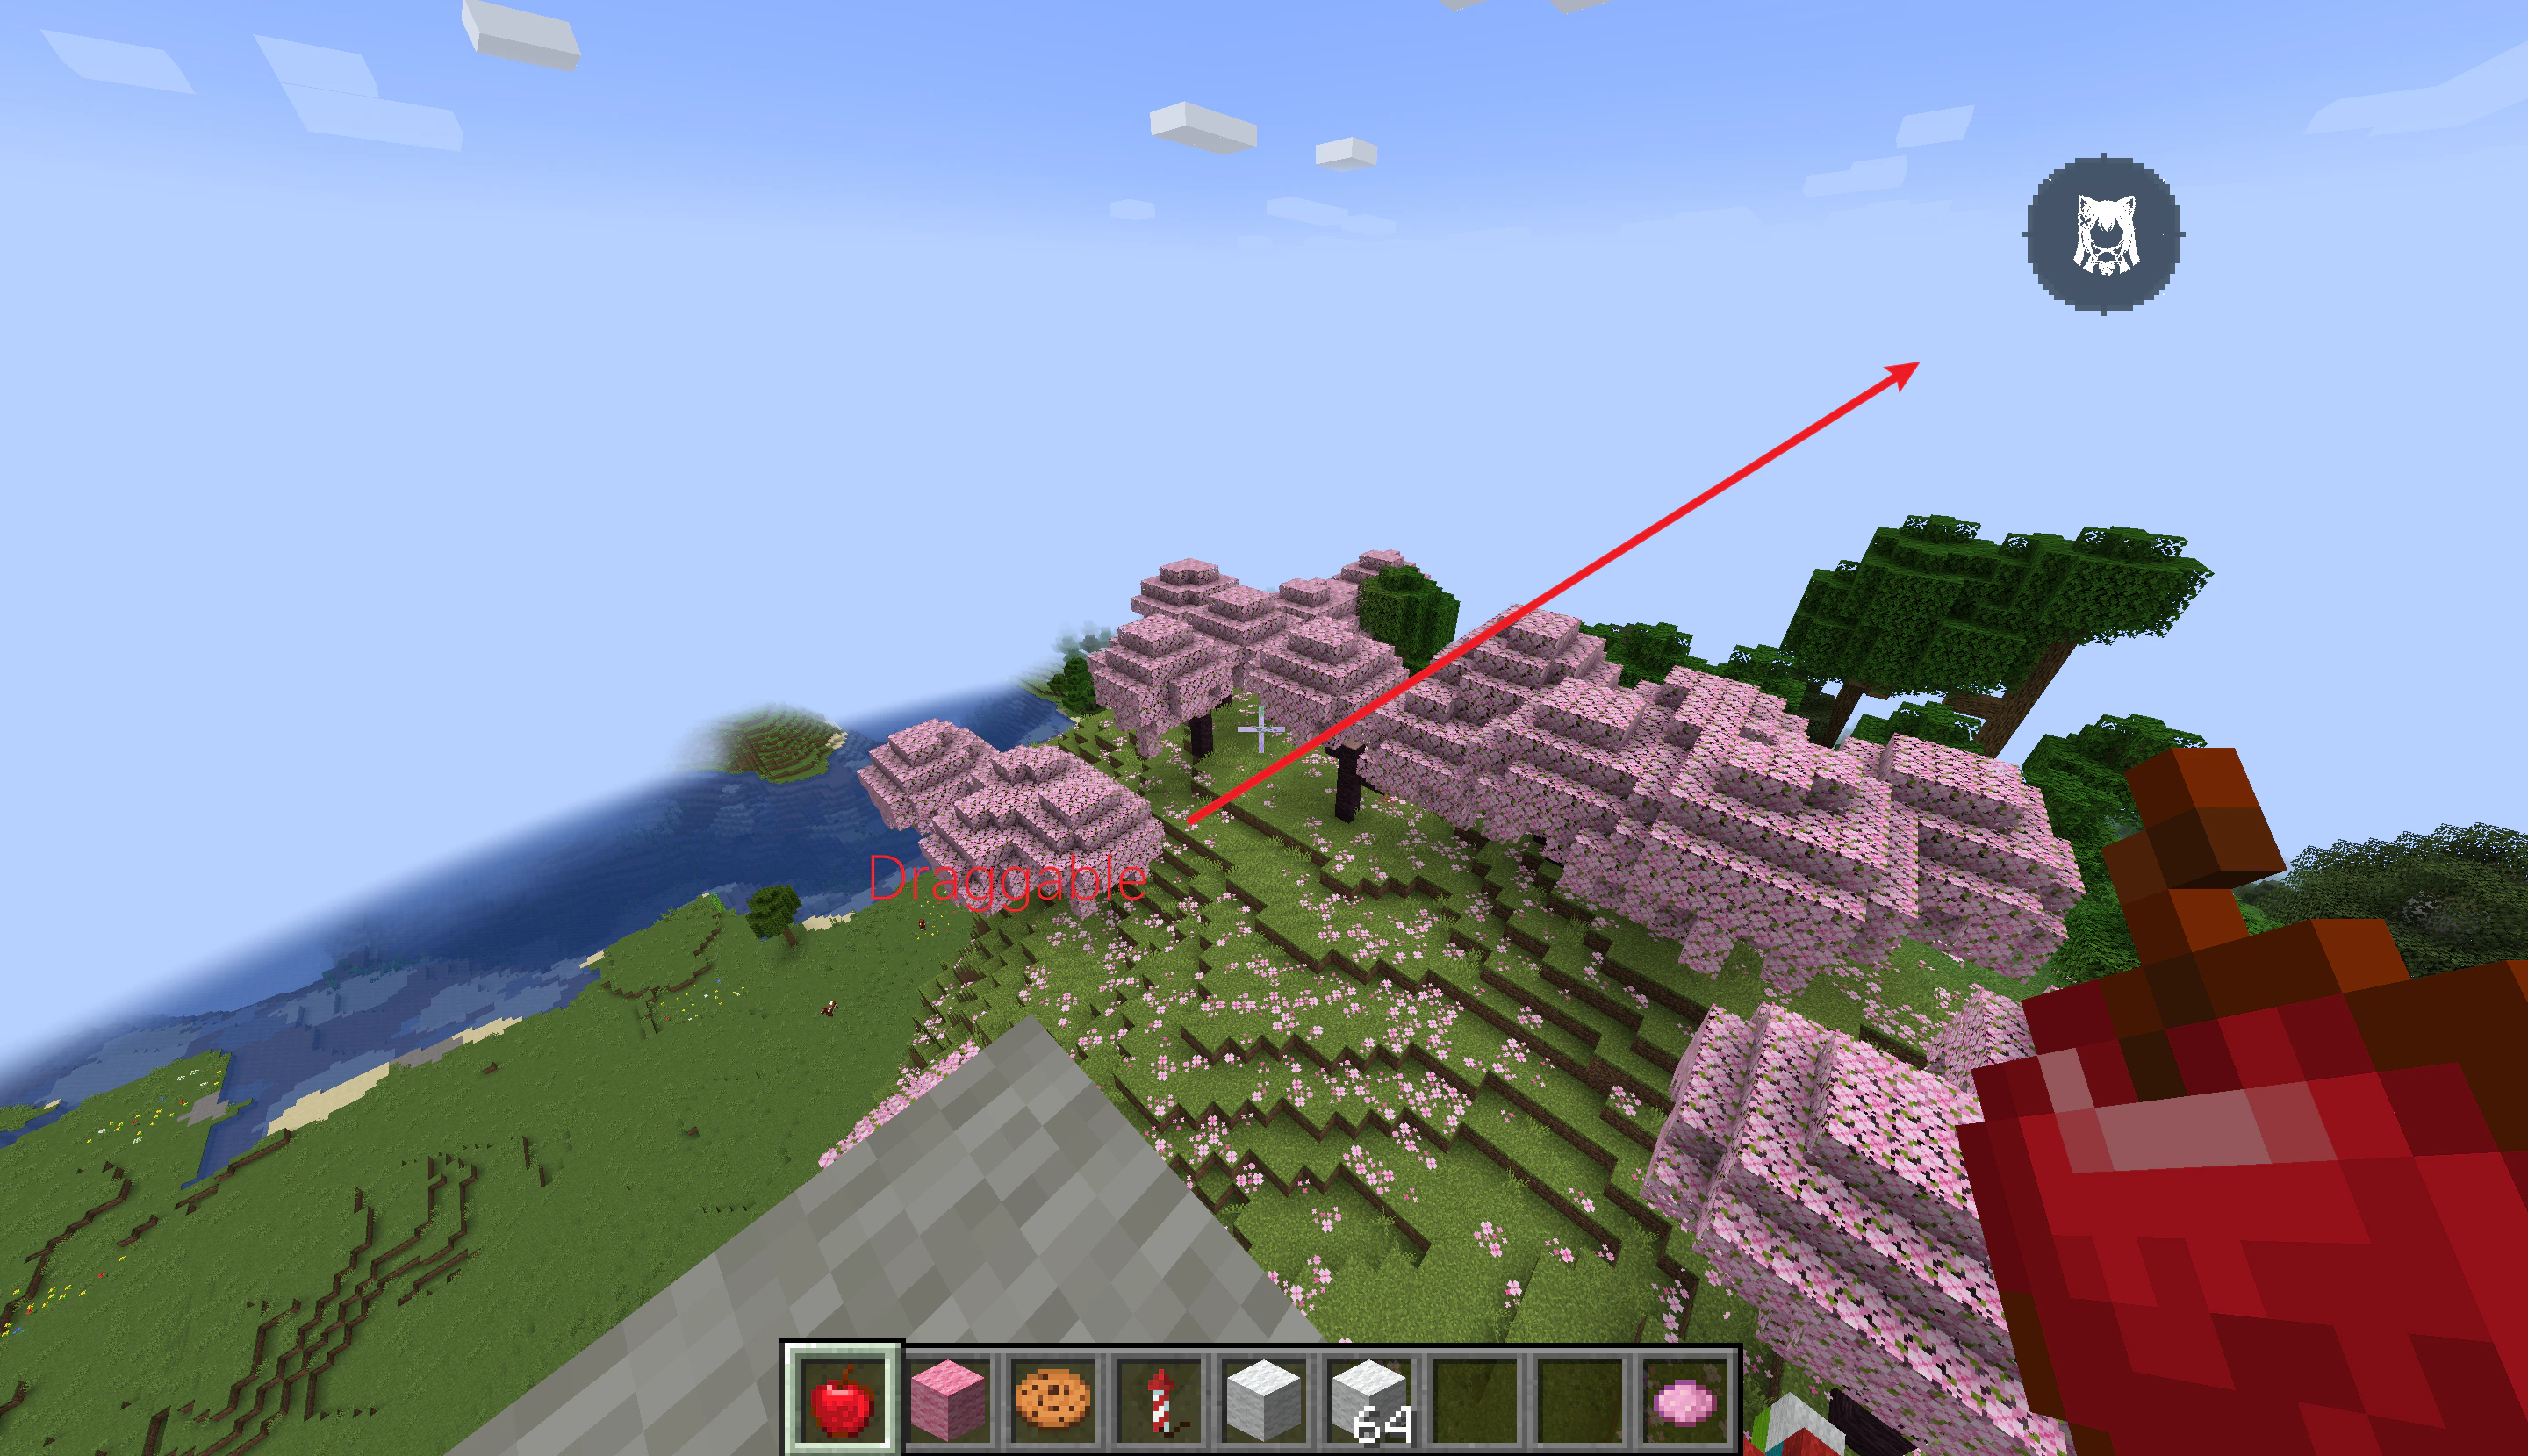
Look for the floating orb (AssistiveTouch) on the left side of your screen. Click the orb to open the overlay, type your message in the input bar, and click **Send**.
3. In MineClawd config screen, paste the key into the **Tavily API Key** field under the **Search** group. You can also set it via command:
```bash theme={null}
/mineclawd config tavily-api-key
```
When configured, MineClawd gains a `search` tool that queries the web and returns concise source snippets. If the key is not set, the search tool is disabled and MineClawd will let you know if you ask for a web search.
## Step 6: send your first message
You have two ways to talk to MineClawd:
### Option A: use the overlay GUI
Look for the floating orb (AssistiveTouch) on the left side of your screen. Click the orb to open the overlay, type your message in the input bar, and click **Send**.
 ### Option B: use chat commands
Open chat and run:
```bash theme={null}
/mclawd hello
```
Both methods work. The overlay gives you streaming responses and session management in one place. See [using the GUI](/tutorials/using-the-gui) for the full walkthrough.
## If it does not work
Go to [/resources/troubleshooting](/resources/troubleshooting) and follow the matching symptom.
## Next steps
Use these guides to go deeper after your first successful request.
Learn the overlay layout, streaming status, and inline questions.
Create, switch, and repair Sessions for long-running work.
Browse and manage everything MineClawd creates in your world.
Explore every `/mineclawd` command with examples.
### Option B: use chat commands
Open chat and run:
```bash theme={null}
/mclawd hello
```
Both methods work. The overlay gives you streaming responses and session management in one place. See [using the GUI](/tutorials/using-the-gui) for the full walkthrough.
## If it does not work
Go to [/resources/troubleshooting](/resources/troubleshooting) and follow the matching symptom.
## Next steps
Use these guides to go deeper after your first successful request.
Learn the overlay layout, streaming status, and inline questions.
Create, switch, and repair Sessions for long-running work.
Browse and manage everything MineClawd creates in your world.
Explore every `/mineclawd` command with examples.